UPDATED 12/28/10, 10:30AM CST
 |
| BibleReader 5 |
The latest example of this is the recent news that Olive Tree Bible Software's "BibleReader" was featured in the iTunes Rewind 2010 list ("Books" category), as well as making the Top Grossing list in "Books". For those of us who have followed this company's history, this is certainly fitting news. Olive Tree, based in Spokane in beautiful Washington state, has blazed the way for mobile Bible study software, starting in 1998 with BibleReader for the Palm OS. Long before the iPhone revolutionized mobile tech, Olive Tree was at the forefront trying to provide a viable Bible study platform on mobile devices, despite their glaring limitations.
With the advent of iOS and, later, Android, the base platform has become much more capable, and Olive Tree, along with other mobile Bible shops like Mantis, and venerable desktop Bible software companies who have recently developed mobile offerings, such as Logos and Laridian, have taken full advantage of the new possibilities.
 |
| BibleReader+ on Palm OS5 |
Now, Olive Tree has capped of an already successful year with it's biggest upgrade yet for the iOS platform, launching BibleReader 5.0 on December 23, 2010.
I don't believe I'm exaggerating to say that Olive Tree has not only raised the bar (while they were arguably on top in the first place), they've developed a platform that has the potential to revolutionize mobile Bible study. I should note the features I'm going to look at are not necessary new to Bible study software as a whole - Logos and others have taken this field very far. But to have this kind of functionality and user interface on a mobile device is quite extraordinary, to say the least.
BibleReader 5.0 is now available from iTunes!
 |
| BibleReader 4.12 |
BibleReader 4.x has garnered favorable reviews from many, and for good reason. It was possibly the best Bible study app available for mobile devices till today. But while I can reasonably summarize the feature set of 4.12 in a signle paragraph, 5.0 is in a league of it's own.
My review is broken into the following sections (this is not exhaustive, there's plenty more I don't have space to cover, believe it or not):
New User Interface:
 |
Main Screen, with Split Window Open. |
 |
Freely selectable text |
The first thing you'll probably notice is the vastly upgraded UI. Perhaps taking a queue from iBooks, BibleReader 5.0 sports a new "book-like" theme, with a sepia tone and subtle icon set replacing the more "iphoneish" look of previous versions. No page-turning is available (though it *may* be in the pipeline). However, there's much more to 5.0 than a new set of clothes, and what the UI may lack is more than made up in the rest of the feature set.
UPDATE!
A quick note - if you don't like the "book-look", it can be changed by going to the 'Settings' menu- -> Advanced Settings -> Advanced Color Settings, and turning the 'Use Book Image' option off. This will also allow you to use separate background colors for the two windows, and it can improve scrolling performance.
On the main screen, you'll notice right away that the Bible text is freely selectable - a seemly small but welcome improvement, and one that has a lot more to it than you might realize at first glance.
Selecting text brings a pop-up menu with copy, highlight, bookmark & note actions, as well as a suspiciously named option "more". More on that (no pun intended) in a minute.
 |
Strong's Definition Pop-up |
This is a favorite feature of mine (also worked in the 4.x series, of course). On any Strong's-enabled Bible, tapping a word with a Greek/Hebrew underlying word (by default these show up in a shade of gray to differentiate them) brings up a pop-up window with the Strong's definition of the word. This provides an easy way for those-of-us-whom-Greek-is... well, Greek, to get "under the hood" of our English Bibles. The "Lookup" button on the bottom of the window lets you... well, we'll get to that in a minute.
A quick note here - on a Strong's enabled Bible, selecting text is a bit tricky, since any words are hyperlinks. Simply tap and hold for a couple seconds, and a pop-up menu will appear, giving you an option to "Select Text".
Toolbar Icon Key
 |
Library, Verse Chooser, History, My Stuff, Settings, Search, Ribbon |
Continuing, you'll see the top of the screen contains a toolbar, with menus for navigating your Bible/resource, choosing another book, browsing history, a "My Stuff" menu for browsing user-created annotations (notes, highlights, bookmarks, and tags... more later), a settings menu, and the search menu.
 |
| Verse Chooser in List Mode (Default), to switch to Grid Mode (far right) pull down and select the grid style from the toolbar. |
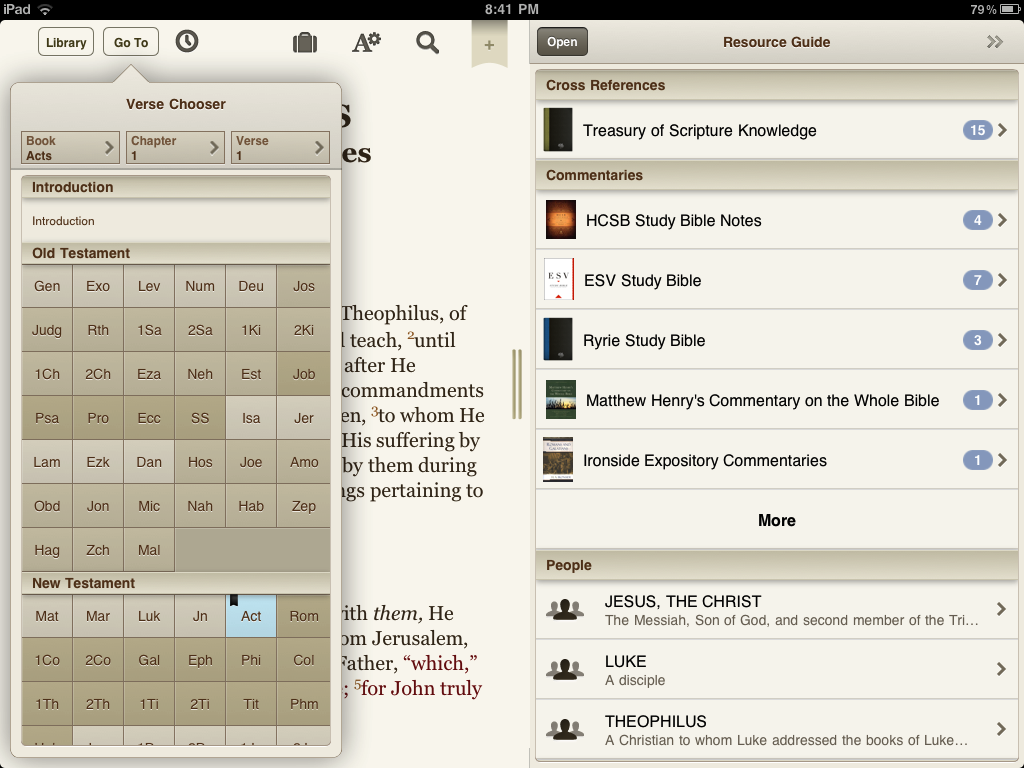
This is the verse chooser - it's fairly straightforward; tap either of the three cells at the top to select book/chapter/verse. Users of the 4.x series probably remember (and possibly long for!) the "grid" style verse chooser. If you prefer this (and I very much do!), simply pull down on the verse chooser menu; at the top there a couple buttons for toggling the verse chooser layouts. Pick grid, and your all set (it remembers your choice)!
Tapping the small grab bar on the right-hand edge of the screen opens the split window, with it's own set of toolbar icons, and a launch button for opening split-window "tools".
 |
"Open" Menu for the Split Window |
It's here where we get our first glimpses of the awesomeness of 5.0. Opening the Split Window's launcher menu gives us options to open a recent or favorite resource (commentary, study notes, or another Bible version, for instance), as well as two new tools (modules that are specific to the split window): "My Notes", and "Resource Guide".
Notes:
 |
New "Note Pad" view for editing notes. |
"My Notes" brings up a notepad-styled listing of your, well, notes (surprise!). The notepad motif carries into the actual notes which are displayed on a ruled "paper" background with handwriting style font (customizable). Viewing/editing notes in the split window is actually a very-requested feature, as previously notes were primarily viewed through small pop-up windows over the Bible text, not a very convenient way to follow along with a sermon, and well nigh useless for giving a sermon. Now, notes can be viewed and edited independently of the resource in the main window, and can be created arbitrarily rather than from a single verse (though notes can also be created from verses, in which case they will show up in the text and can be opened in pop-up windows or in the Notes tool). And a full-screen mode is available now as well! Note taking within BibleReader is now not only practical, but enjoyable.
 |
Full Screen Mode for editing notes. |
Other features here include automatic linking between verse references in your notes and the installed Bibles (this feature links to you last opened version - it is not currently configurable as it is in PocketBible, though in my opinion this is offset by the transparency of BibleReader's linking), and online syncing, which I will address separately. The verse linking works surprisingly well, detecting all the abbreviations I tried, and even some misspellings!
 |
Delete, Change/Add Category, Add Tags. Change Icon, Fullscreen |
Some of the richer features in 5.0 ares hinted at in the Notes tool. Notes can be tagged, using either user-created tags, as well as a few other interesting entities - namely "People", "Places", and "Topics". An explanation of these characters brings us to our next feature, the heart of BibleReader 5.0's awesomeness. Enter the second split window tool, the "Resource Guide".
Resource Guide:
 |
The Resource Guide |
Note:Before you can use the Resource Guide, you'll need to download the "entity database" - this is a free download, but it's a bit big (30MB IIRC), so be patient.
The "Resource Guide" is a masterpiece of mobile Bible study design, and if BibleReader 5.0 shipped with this as it's only new feature, it would be totally worth the upgrade. The Resource Guide's primary function, as it's name suggests, is to aggregate all the resources in your library (commentaries, study Bibles, cross references, maps and even image/video content (the latter is still in it's infancy) related to the passage at hand. This is similar to the concept of a passage guide as implemented in some desktop Bible software, making it convenient to use multiple resources without constantly switching back and forth.
 |
Viewing People, Topics, and Places in the current passage. |
However, the Resource Guide doesn't stop here. Using the standard "Naves Topical Bible Index" as an outline, the Resource Guide breaks down the current passage into the entities mentioned earlier - "People" (Paul, Cornelius, Moses), "Places" (Jerusalem, Rome, Sodom), and "Topics" (Love, Forgiveness, Faith). Selecting any of these entities performs the aforementioned "Lookup" on the subject, searching your installed dictionaries, any annotations you may have tagged with the subject, images and graphics from study Bibles, as well as (in the case of "Places") maps. So if I've taken sermon notes from a message from the book of Acts, I may have my note tagged with subjects like "Paul", "Peter", "Hope", "Holy Spirit", "Jerusalem" and so on. Now, if I select the Person entity "Paul" in the Resource Guide, my note will show up in the results. Once you've built up a substantial collection of personal annotations, this can be a powerful way to take advantage of them.
 |
Viewing Images for the "Place" Jerusalem (images from the HCSB Study Bible and free "Images from the Holy Land" sample) |
Even multimedia can be viewed using the Resource Guide! Images/maps/charts from "enhanced" resources (something I'll mention at the end of this review - yes, it does end) also are pulled in. I won't elaborate on it here, but selecting a map/image allows you to pinch and zoom and/or view fullscreen. There's also a free "Images from the Holy Land" sample that works with the Resource Guide. You can bet you'll see more multimedia content in the future (including video!).
 |
| Resource Guide displaying user-created annotations (notes, tags, highlights and bookmarks). |
The Resource Guide also aggregates any user-created Tags in the current passage. Tags are an extremely powerful way to organize your annotations. The possibilities are almost endless. As you can see in the screenshots, I have tags for speakers at my local church, so I can tag my notes from that speaker and view them accordingly.
I also use this to supplement the built-in entities with my own topics (see for instance, "SEPARATION (FROM GOD)" in the third screenshot above). I might create a tag for some doctrinal issue I've been studying, and bookmark all related passages I know of, adding this tag as I create each bookmark. I then can use this tag on my personal notes regarding the subject, and then when viewing the Tag in the Resource Guide, I can see all my bookmarks and notes. Highlights can be tagged in the same way.
There are several "Sections" to the Resource Guide - all of which can be turned on/off and further customized (for instance, choosing which commentaries to search) from the Settings menu (tap the ">>" icon at the top-right of the Guide). You can also rearrange the sections themselves. The available sections are:
I also use this to supplement the built-in entities with my own topics (see for instance, "SEPARATION (FROM GOD)" in the third screenshot above). I might create a tag for some doctrinal issue I've been studying, and bookmark all related passages I know of, adding this tag as I create each bookmark. I then can use this tag on my personal notes regarding the subject, and then when viewing the Tag in the Resource Guide, I can see all my bookmarks and notes. Highlights can be tagged in the same way.
 |
| Resource Guide Sections. |
- Content - A rather CPU-intensive option, I don't recommend it and it is off by default. Try it if you like.
- Cross Reference - Lists all cross-references for the current passage. Currently only works with the Treasury of Scripture Knowledge resource.
- Commentaries - See above.
- Bibles - Allows you too see the current passage in any of your installed Bibles - awesome for comparing multiple versions (only one at a time, however)
- People - See above.
- Places - See Above.
- Topics - See Above.
- Maps - Displays maps/images from any Bible Atlas or enhanced study Bibles you have installed. These can be viewed with pinch & zoom, and in fullscreen.
- Outlines - Pulls out any book outlines from enhanced commentaries/study Bibles.
- Introductions - Pulls out any book introductions from enhanced commentaries/study Bibles.
- My Notes - See above.
- Tags - See above.
 |
| Select-text pop-up menu. Note "More..." button. |
 |
| "More" Text-select Menu |
 |
| Selection Screen for Look Up - Note Strong's numbers (g####) |
 |
| Lookup Menu |
I don't have any screenshots here because my installed original language (OL) tools are not very extensive at the moment, but performing a "Look Up" operation on a OL word or Strong's number will search any OL dictionaries or lexicons you have installed. Olive Tree has an extensive collection of these. If you're really into Greek/Hebrew, you'll love this - I'm not there yet (but I'm trying...). For now, be thankful that you've been spared a couple more long paragraphs...
Search:
 |
| Auto-suggest for search terms, and instant search result counts. |
Search is another vital function for any Bible software, since search is something computers do so much better than us, and is such an integral part of Bible study. BibleReader gives us a couple different ways to accomplish this.
 |
| Search for Scripture References from Verse Chooser - also note the toggle buttons between Grid/List modes. |
 |
| Auto-suggest - note suggested verse-reference in the second window. |
 |
| Search from selected text - note Strongs numbers. |
As we saw in the "lookup" section, selecting text in resource and choosing the "More" option allows you to search the selected resource for that text (or a subset of it). This allows you to begin a search right from where you are reading - very convenient! The search results will display within the same pop-up window.
 |
| Search results grouping and collapsing large numbers of results. |
Note from the screenshot that results are grouped by book, and large numbers of results are shortened by book - tapping the "Show ___ More Results" button at the end of each book section expands the list. This makes huge results lists manageable and let's you dig in to the results one book at a time.
 |
| Search Options, Filters, Ranges. |
The above screenshots should give you a good idea of the available search options (reached by tapping the + icon in the search bar)- you can specify ranges of books (and create custom ones), access your search history, and add "commands", keywords that allow you to form complex queries in a sorta sql-like way. TBH I don't use these often, but having the ability to really narrow down searches is a very powerful feature, and one that Olive Tree has been keenly aware of for a long time (even in the Palm OS days, BibleReader had amazing search capabilities).
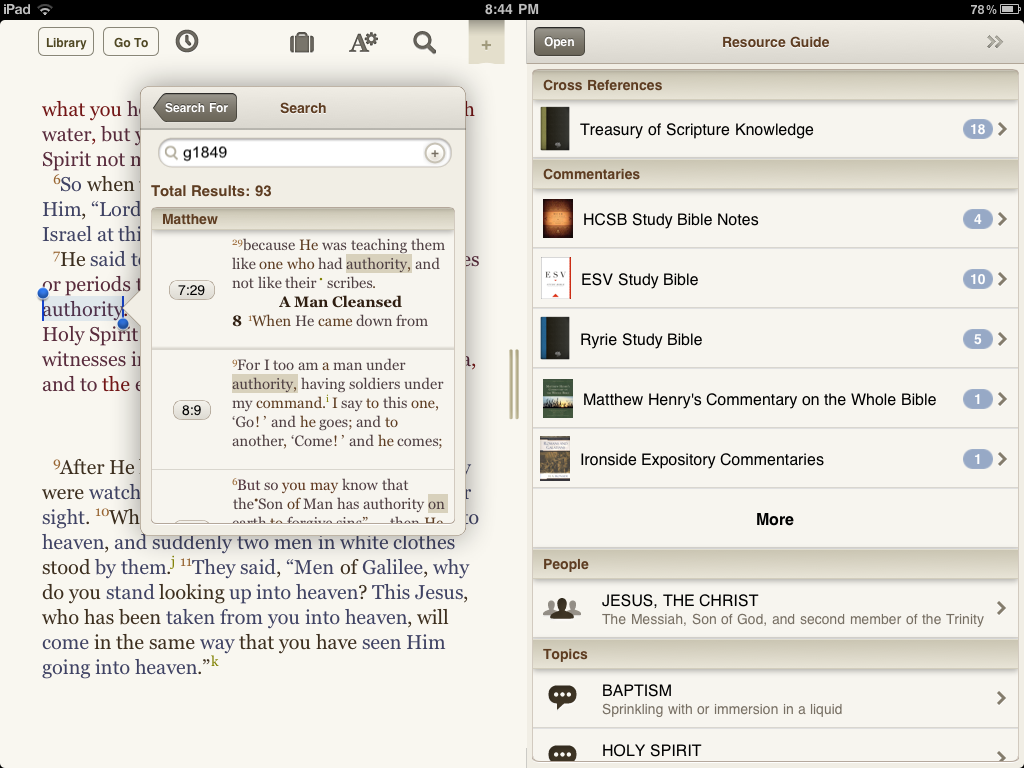 |
| Searching by Strong's Number. |
|
| Search selection screen - note Strong's numbers. |
Gestures:
 |
| Gesture Settings - Choose a gesture (swipe, tap, etc) and choose an action to trigger. |
Another powerful feature in 5.0 are gestures - these require iOS 4.2 to work, they won't show up in previous iOS versions. This feature is incredibly powerful, yet so simple there isn't much to say beyond the screenshots. You pick a gesture (taps, swipes, with up to three fingers on the iPad - two fingers on the iPhone), and pick an action. Available gestures include one-finger double-tap, two-finger/three-finger single/double tap, two-finger/three finger swipe up/down/right/left.
Among my favorite actions to assign are
- "Open my Bookmarks"
- "Bible:[Next/Previous] Chapter"
- "History: [Forward/Backward]"
- "Open Library Quick View" - same as the "Library" button from the toolbar
- "Open History" - gives you access to the forward/back buttons - also available from the History button on the toolbar
- "[Next/Previous] Split Window Tool" - allows you to cycle through Split Window functions: "Standard" (last opened resource), Notes, and Resource Guide.
This last action (or pair of actions) is perhaps my favorite. It allows me with, in my case, a double finger swipe up/down, to switch between my sermon notes, for instance, and the Resource Guide or a commentary. When I swipe to return to my notes, they are open right where I left off, and I can continue. This let's you cycle quickly between your note, a commentary, and the Resource Guide, returning you right to where you left off each time. You can also assign basic utilities like turning sync (between windows) on/off, new-lines for verses, etc. Just open it up and explore - you'll surprised at some of the actions available.
Annotation Sync:
 |
| sync.olivetree.com - Manage your notes. |
 |
| Manage/Organize your bookmarks. |
 |
| Manage/Organize your highlights. |
 |
| Go to "Settings" menu, tap the "Account" button to log in, then tap "Sync" in the "My Stuff" menu. |
 |
| External sync services - currently only Evernote and XML as supported. |
Thoughts:
 |
| BibleReader 5.0 |
The Resource Guide obviously is more useful with more content - I know some will be cynical about this, but it's unavoidable that the more resources you have, the more useful a "RESOURCE" Guide is. Duh. However, not all content is equal. Items can be enhanced by Olive Tree to make the Resource Guide use them better. For instance, my Ryrie & Scofield Study Bible notes show up in the Resource Guide as commentaries. That's a good start, but the HCSB Study Bible notes have been enhanced to work even better - the Resource Guide not only gets the notes as a commentary, but pulls out book introductions, outlines, (features we didn't get to here!) maps, images/charts, etc.
Unfortunately, some resources don't work in the Resource Guide yet at all. One such item is the Thompson Chain Reference Bible - it's chain references don't show up as cross-refs, and none of its study material shows up in the Resource Guide - it's like it doesn't exist. However, this is the only resource I know of that acts this way - other study Bibles should at least work as "commentaries"
Right now only a limited selection of items from Olive Tree's store have been enhanced, but you can be sure more are on the way - BibleReader 5.0 is the future for Olive Tree, and they'll want all their resources to work as well as they can. The good news is that when an item you've bought is enhanced, the upgrade is yours for free - just open the Library on your device (something I haven't discussed here) and choose the "Check for Updates" button at the bottom. Also, you can browse the in-app store from the Library - all enhanced content is marked with a star, and there's a separate category for it as well.
 |
| Enhanced Content Section in in-app Store. |
 |
| Sammy (7 yrs) looking up Strong's definitions |
Speaking of which, if you're interested in jumping in on Olive Tree's latest creation, now's a good time - until January 2nd, 2011, almost all resources purchased on olivetree.com are 25% off - that's a great discount, and if you choose one of their many collections, you can get a further discount (over 60% in some cases). I am not paid to say this (although I wouldn't complain!). I'd just wish somebody else had told me about the online sales when I first made the investment - books can be expensive, even if they are virtual!
Important note: this only applies to items purchased on olivetree.com - not the in-app store! Items purchased from the online store are added to your account, and can be downloaded to your device once you register it. It's a bit more work, but it's worth it IMO, since you have all your resources available to all your devices instantly, and upgrades are much easier to get. Just FYI.
Okay, rather than a ceremonious conclusion, I'll just shut up - take my comments at the beginning as my closing comments. I do want to give a big thank you to the great team at Olive Tree Bible Software, for all their hard work, and for the amazing result. It's truly an amazing operation.
That's it - I'm stopping right now. By the way...
